Archaeologists recover evidence of the past by digging at archaeological sites, an activity called excavation. Unfortunately, excavation destroys a small area of an archaeological site; we cannot put everything back into the ground the same way that it was found. Because archaeology is destructive, we dig very carefully and make detailed notes and maps so that other archaeologists can also understand what artifacts were found and where. It is also important that we never dig up an archaeological site without a clear goal, as we do not want to destroy the archaeological record without a good reason. Archaeologists only dig to answer specific questions about the past that cannot be answered other ways.
When archaeologists do dig, we do not dig quickly or use big machines, but instead dig very slowly and carefully using small tools and brushes. Archaeological excavation begins by creating a square using nails and string. This square, called a test unit in archaeology, can come in different sizes, commonly 2 meters on each side. Once the square is formed, it is given a name, usually something like "Test Unit 1", and its four corners are mapped so archaeologists know exactly where it was located. Then we begin to dig using a shovel or a trowel. When we dig, we only dig within the square, and we dig in levels (thin layers of soil that are usually only 10 to 20 centimeters deep) or by stratigraphy (layers of soil that are a different color), so that we can keep track of what artifacts are found at different depths or layers within the test unit. All artifacts from a specific level within a test unit are put in a bag and labeled with their provenience, or location information, which usually includes the name of the site, the name of the test unit, the name of the level, and the date they were excavated. This is done so that we know exactly where artifacts came from when we clean and look at them later. Archaeologists continue to dig in a test unit until no more artifacts or soil changes are found. The test unit is then filled back in with dirt and we move onto the next unit!
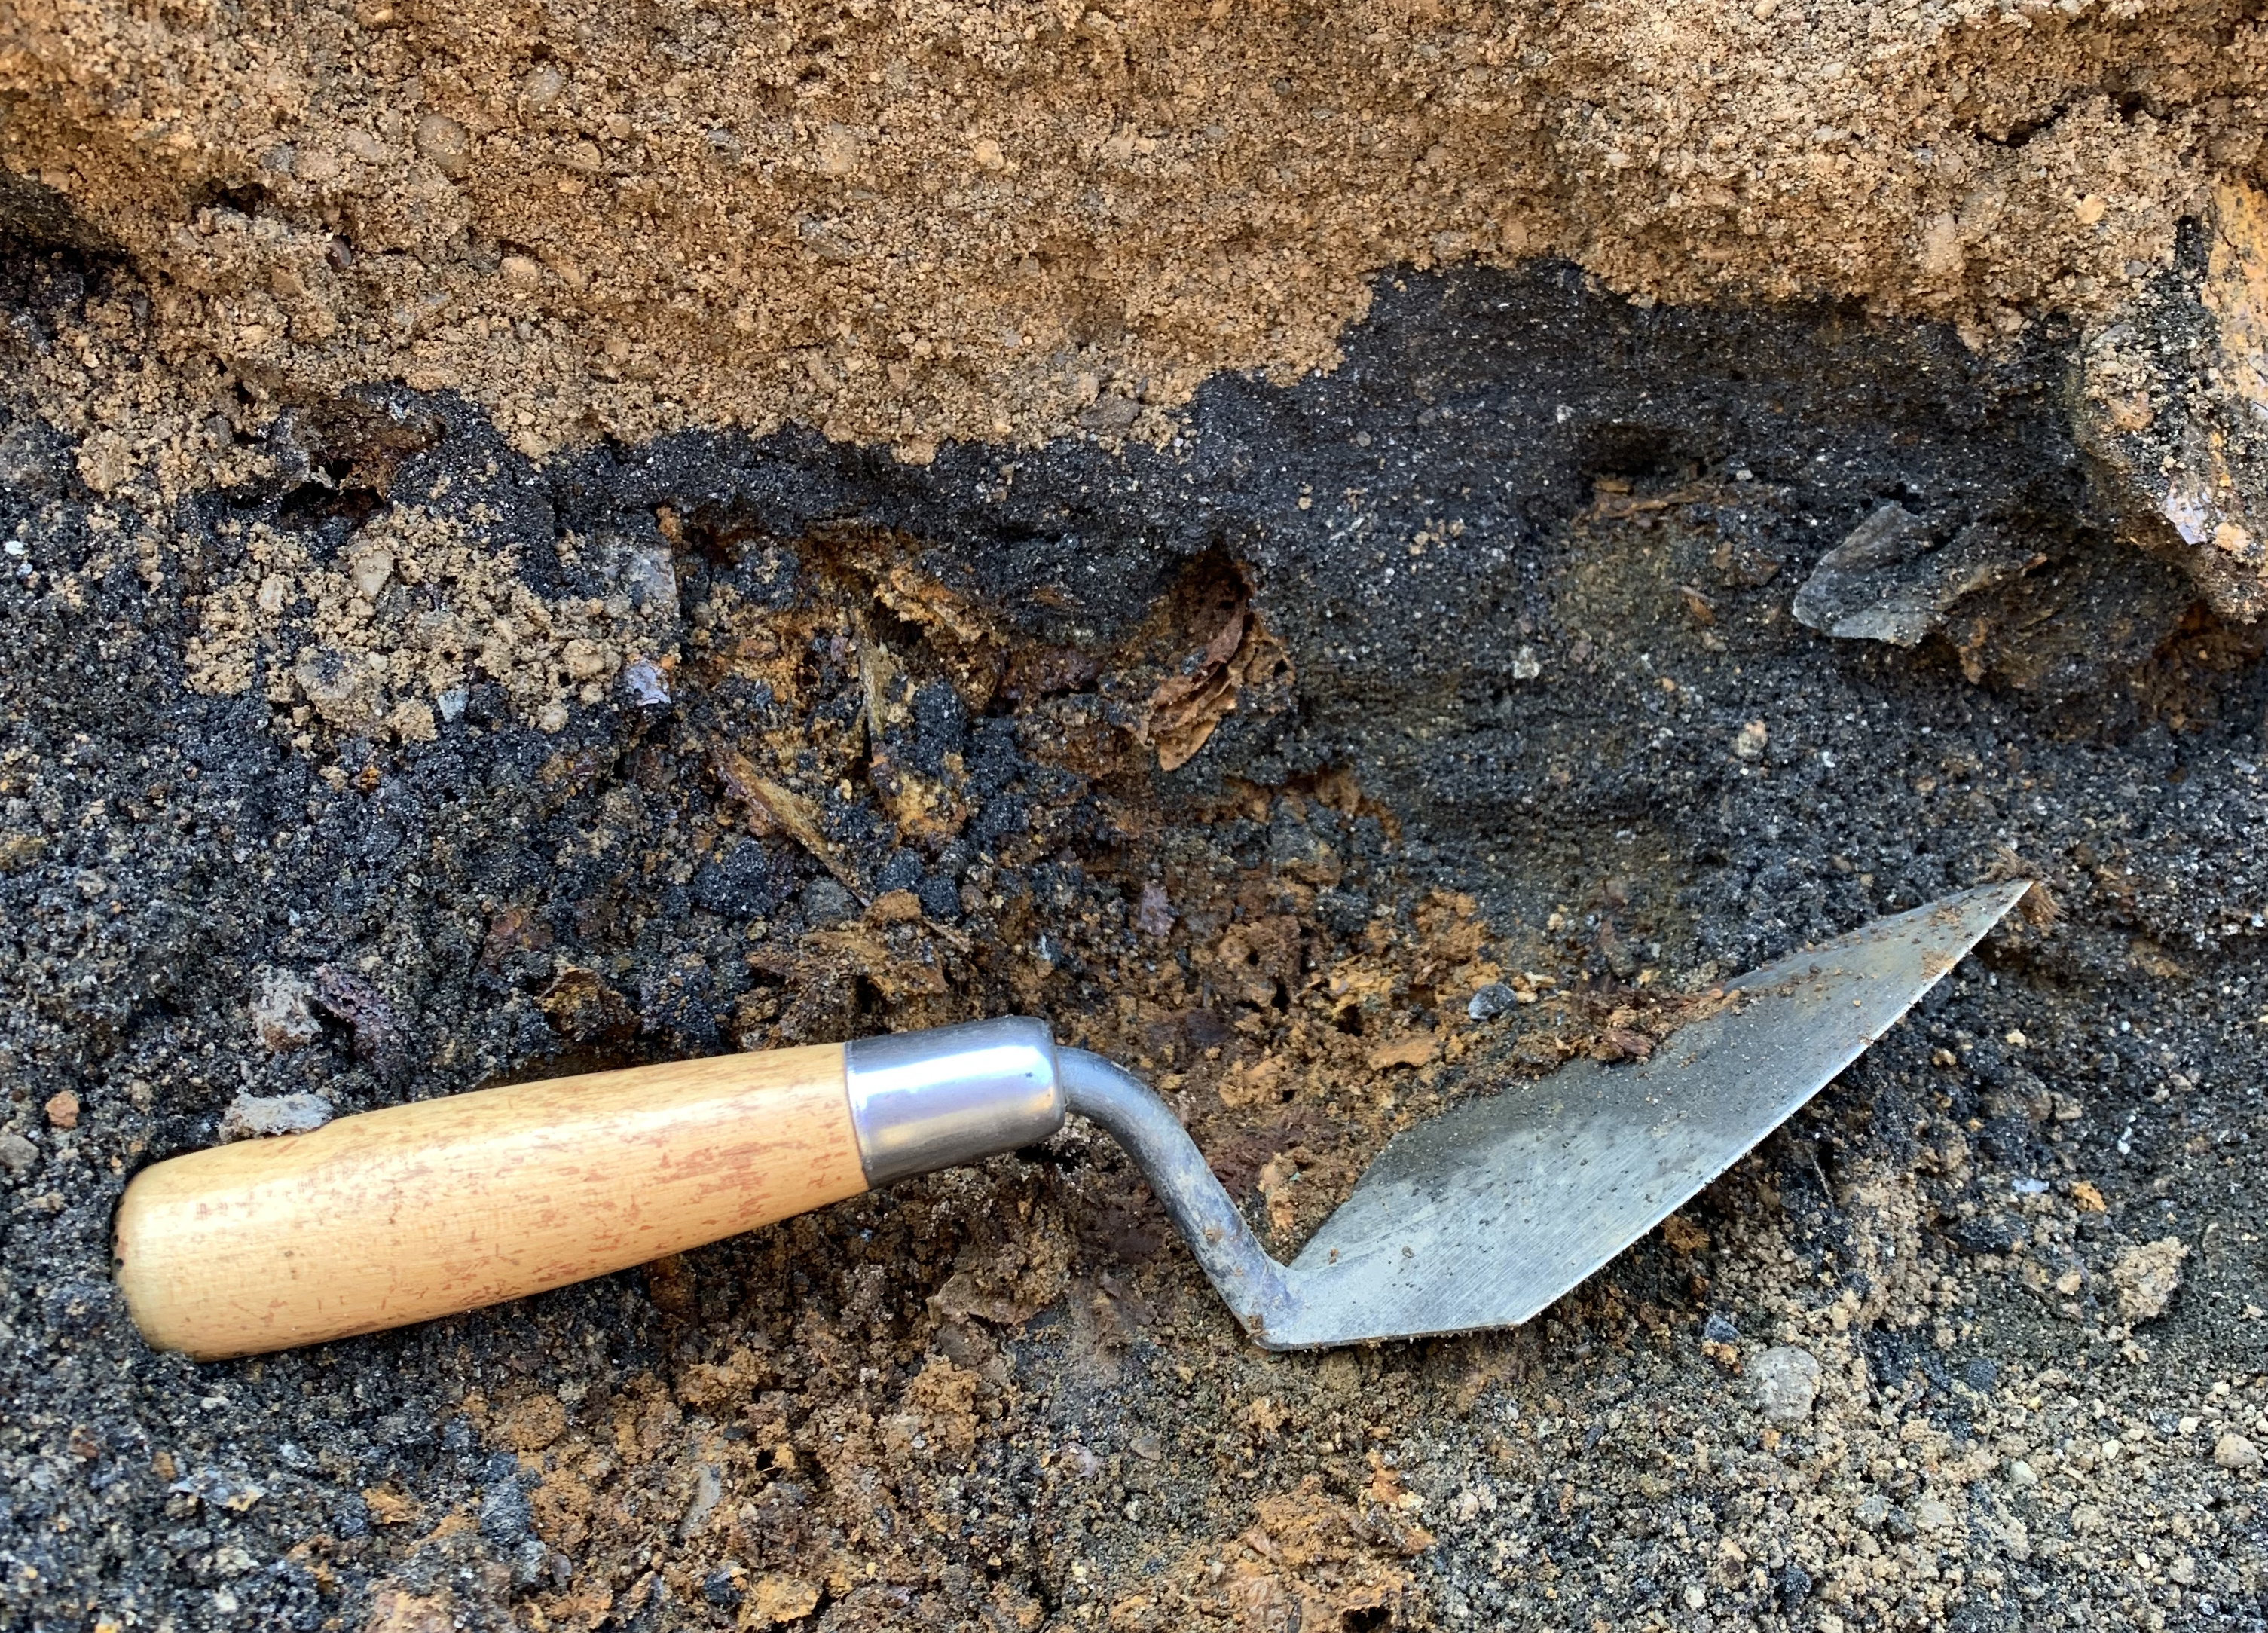
Archaeologists use a number of smaller tools when we excavate at an archaeological site, all of which are used in different ways. The most famous archaeological tool is the trowel, which can come in different shapes and sizes. Basically, a trowel is a small, thin piece of metal attached to a handle. Using a trowel, archaeologists can carefully scrape away dirt and delicately work around artifacts. If needed, we can also dig quite quickly using a trowel, making it the perfect all-purpose digging tool. Alongside trowels, archaeologists use shovels to dig a little quicker. Using shovels, we can take off thin layers of soil at a time. We are able to move more dirt, but still watch for artifacts and soil changes. When we find artifacts in the ground, we use large brushes and wooden picks to carefully remove dirt from around the objects. All the dirt that comes from a unit is put in buckets and then passed through a screen so that small artifacts are not missed. Depending on how the excavation is being performed, other tools may also be used. For people obsessed with old things, archaeologists love their shiny new tools!
As mentioned above, a critical part of archaeology is taking notes. Since we cannot dig the same test unit twice, archaeologists take detailed notes of everything we do so that future archaeologists can recreate excavations and find exactly where specific artifacts were found. Note-taking begins before digging even starts, as we first write a summary of our goals and plans for the specific excavation being done. We also draw a map of where our test unit is located within a site. Once excavation starts, we take detailed notes about what types of artifacts we are finding. In addition, we note any changes in soil color, which can be caused by humans digging to build homes, creating food storage areas, making and using fire pits, or other activities. After taking notes, we then make maps for each individual level within a test unit that shows exactly where artifacts were being found or where soil color changes occurred.
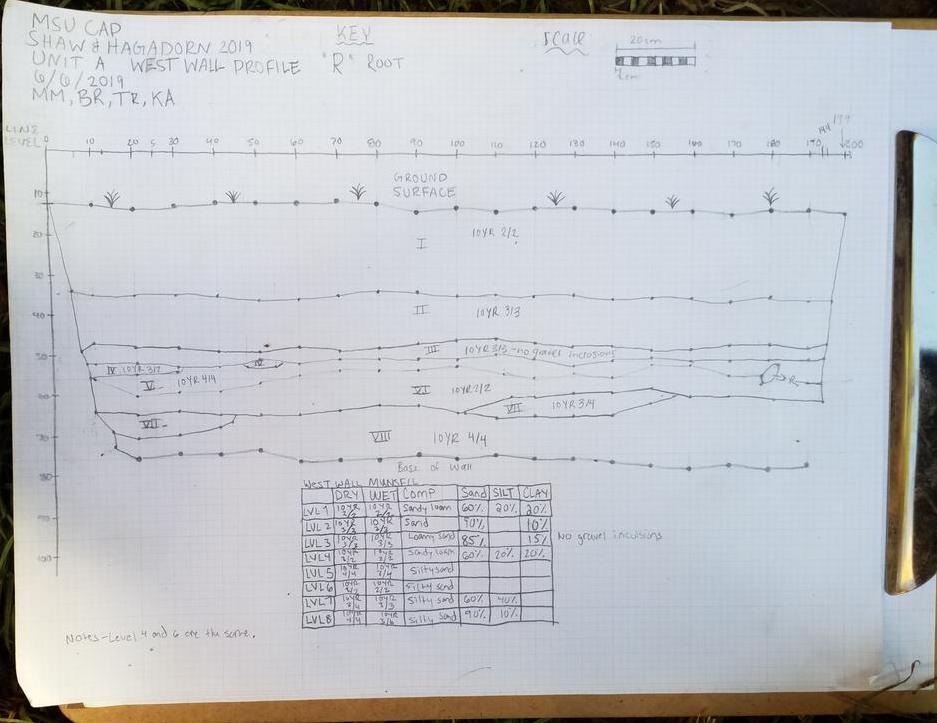
We dig slowly and continue taking notes until no more artifacts or soil changes are found. At that point, we stop digging and make detailed maps of each wall of the test unit, called profile drawings. Profile drawings show how soils changed as we got deeper into the ground and can help us to understand how soil changes relate to each other, as well as which soil layers held artifacts and which did not. At the end of a test unit, we will also write a summary of what we found and our ideas for what this evidence might tell us about the past. We then take all of the artifacts and field notes back to the lab, and the artifacts are cleaned, organized, counted, and weighed.
In order to create profile drawings for test units (like the one in the image above), archaeologists hand-draw the different layers of soil and artifacts that are visible. To do this, archaeologists use grid paper, rulers, and a string laid across the top of the unit to map the precise depth and location of each artifact and soil layer that is visible.
Below, create your own profile drawing of the soil layers in the left image. Look closely at the image for layers of soil that are different colors or that have more gravel and artifacts. On the grid paper to the right of the image, click your mouse or use your finger to create your own drawing of this soil profile. Try to measure using the grid lines to make the soil layers thicker or thinner, depending on how they appear in the image.
